Deploying a Go Web Server to AWS EC2 with Docker

In this article, we will see how to deploy a Go-based web server as a Docker container on a AWS EC2 t2.micro instance.
We will do it in following steps :-
Understand the Go web server code & Dockerfile that will be used to create the image
Launch an AWS EC2 t2.micro instance
Install Docker & other dependencies on the EC2 instance
Copy the code & run the Docker container on the t2.micro instance
1. Understand the Go web server code & Dockerfile that will be used to create the image
We will use the following code, which renders a static HTML page when the user visits the root URL ("/") and listens on port 8080.
package main

import (
	"fmt"
	"log"
	"net/http"
	"text/template"
)

func main() {

	fmt.Println("Starting server on port 8080")

	http.HandleFunc("/", handler)

	log.Fatal(http.ListenAndServe(":8080", nil))

}

func handler(w http.ResponseWriter, r *http.Request) {
	tmpl := template.Must(template.ParseFiles("templates/index.html"))

	tmpl.Execute(w, nil)
}
To create a Docker image, we will use the following Dockerfile, which utilizes the golang:1.22.5-alpine image as the base. It copies the code and dependencies and exposes the application on port 8080.
FROM golang:1.22.5-alpine

WORKDIR /app

COPY go.* ./

RUN go mod tidy

COPY . .

COPY templates ./templates

RUN go build -o app

EXPOSE 8080

CMD ["./app"]
You can find the complete code here.
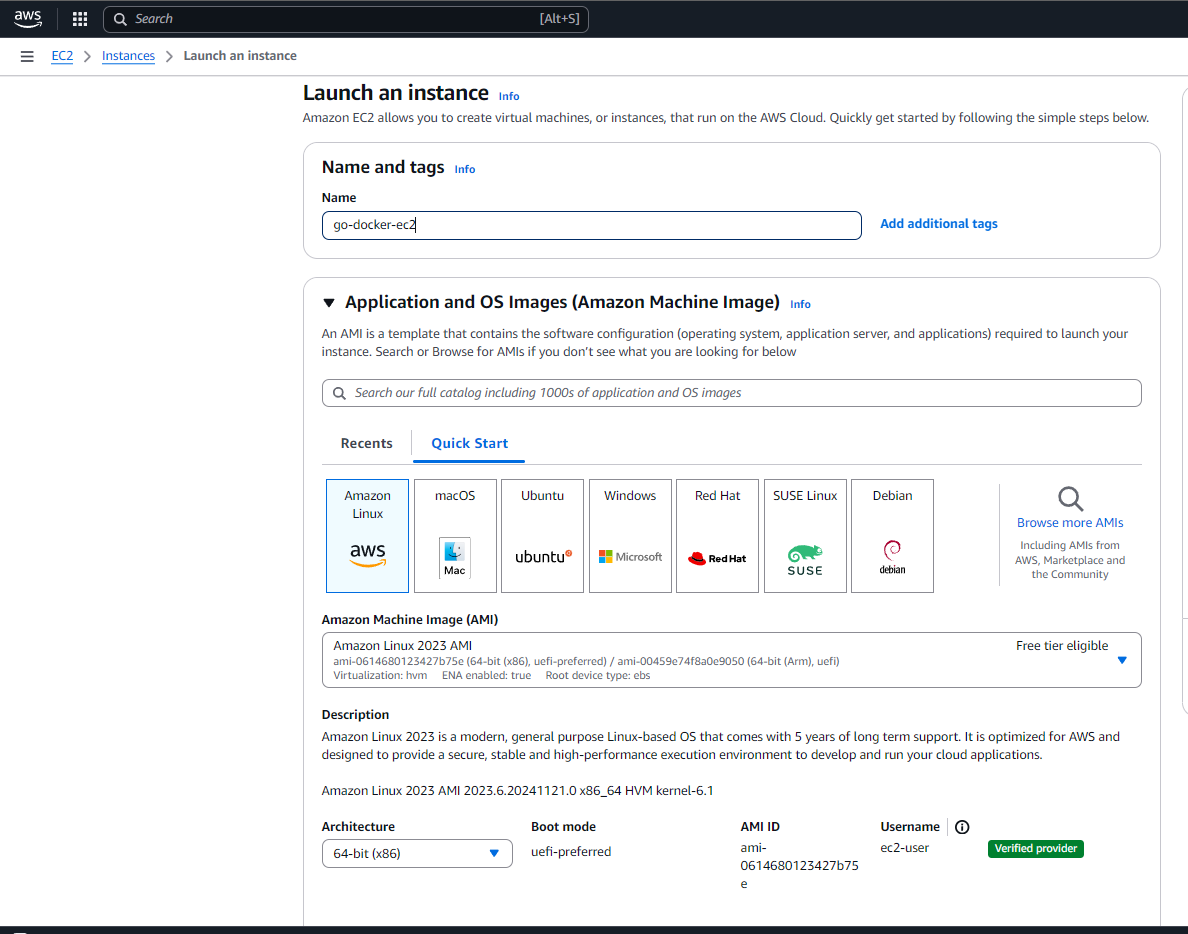
2. Launch an AWS EC2 t2.micro instance
Now, head on to the AWS console and go to EC2 tab to launch a new instance.
Give a suitable name to the instance and keep the default selection for the OS Image that is eligible in the free tier.
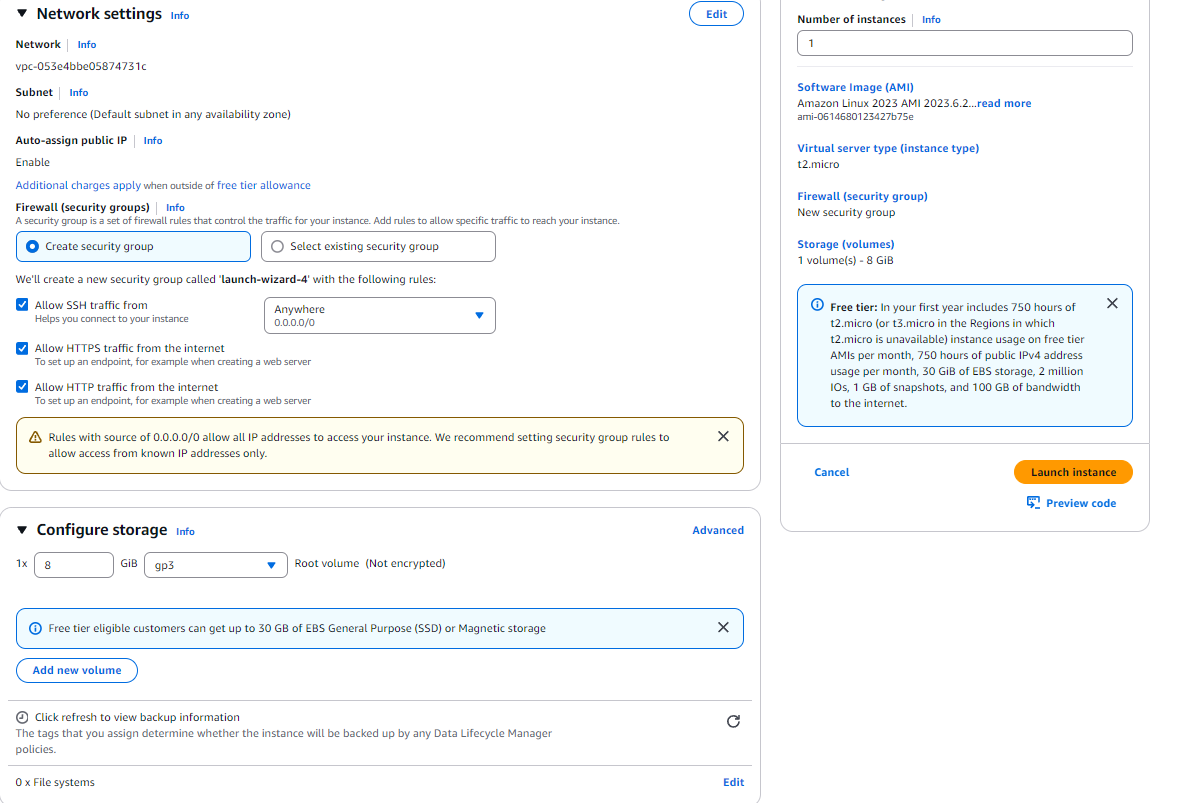
Subsequently, keep the default selection of instance type set to t2.micro which is also eligible for free tier and click on Create new key pair with the default options. This will download a PEM file to your local machine. We will use this key pair in the final step to connect to the instance from the local machine.

In the network setting tab click on all radio buttons that will allow SSH, HTTP, & HTTPs traffic from the internet to our EC2 instance.
Keep the configure storage tab as it is & click on the Launch Instance button to create the instance.
3. Install Docker & other dependencies on the EC2 instance
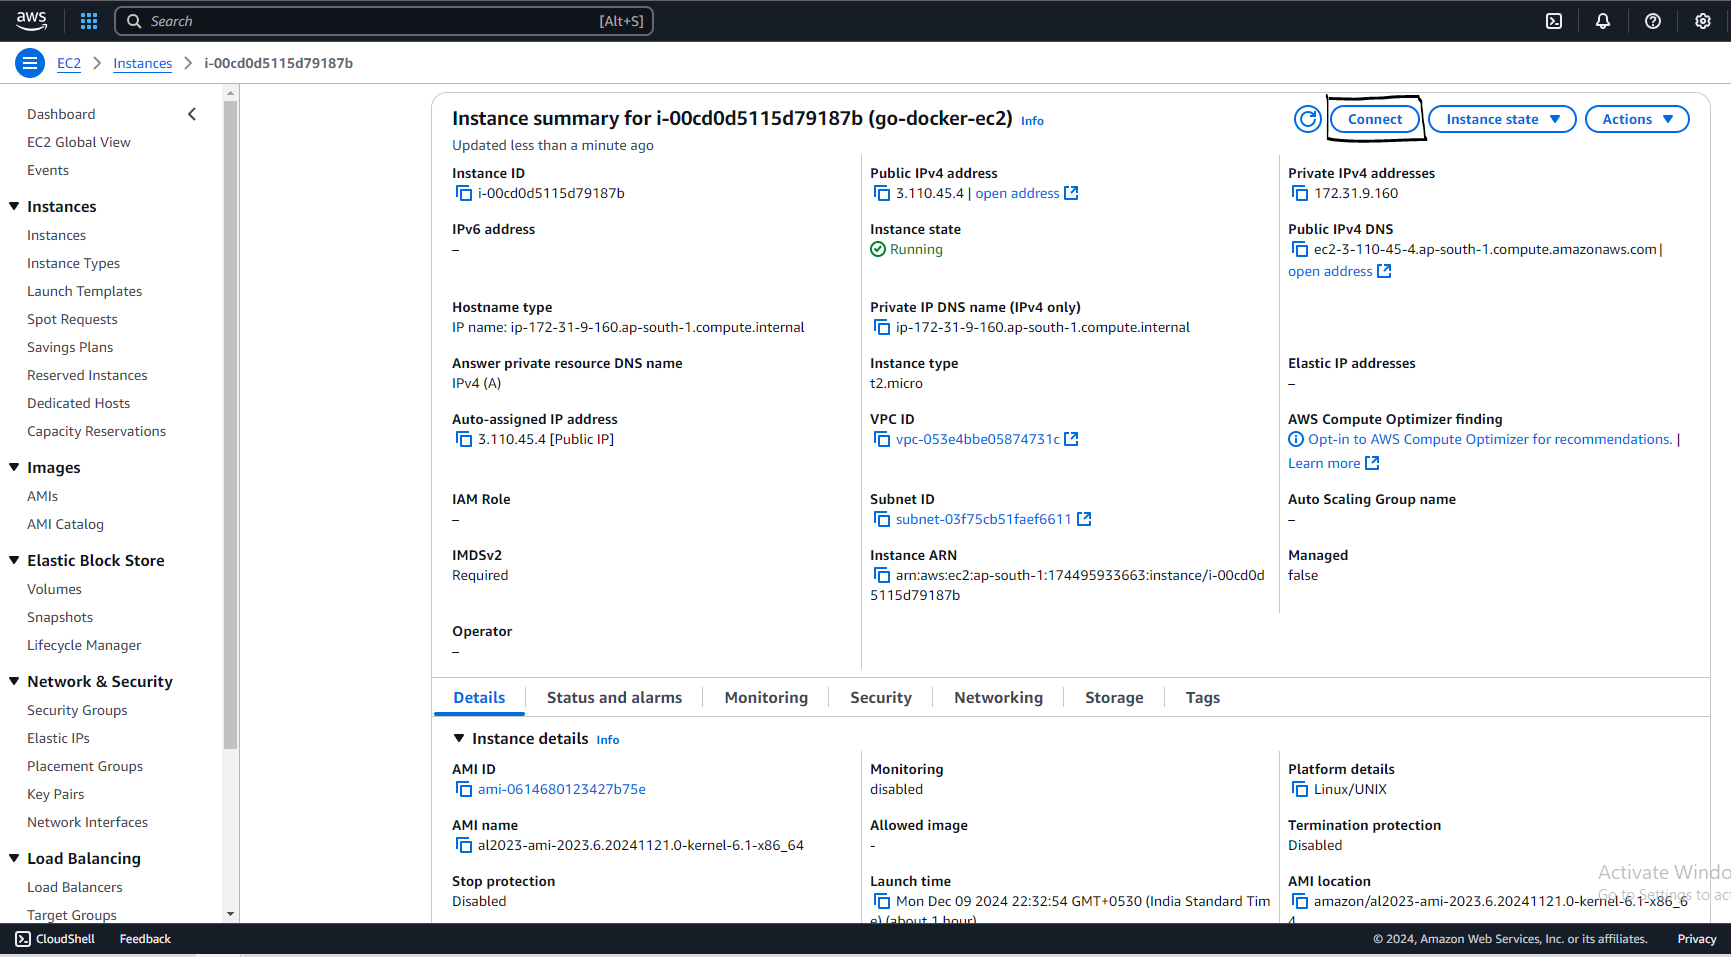
Now once the Instance is created go to the instance details page & click on the Connect button
On the next page, click the Connect button to connect to the instance using the EC2 Instance Connect method.
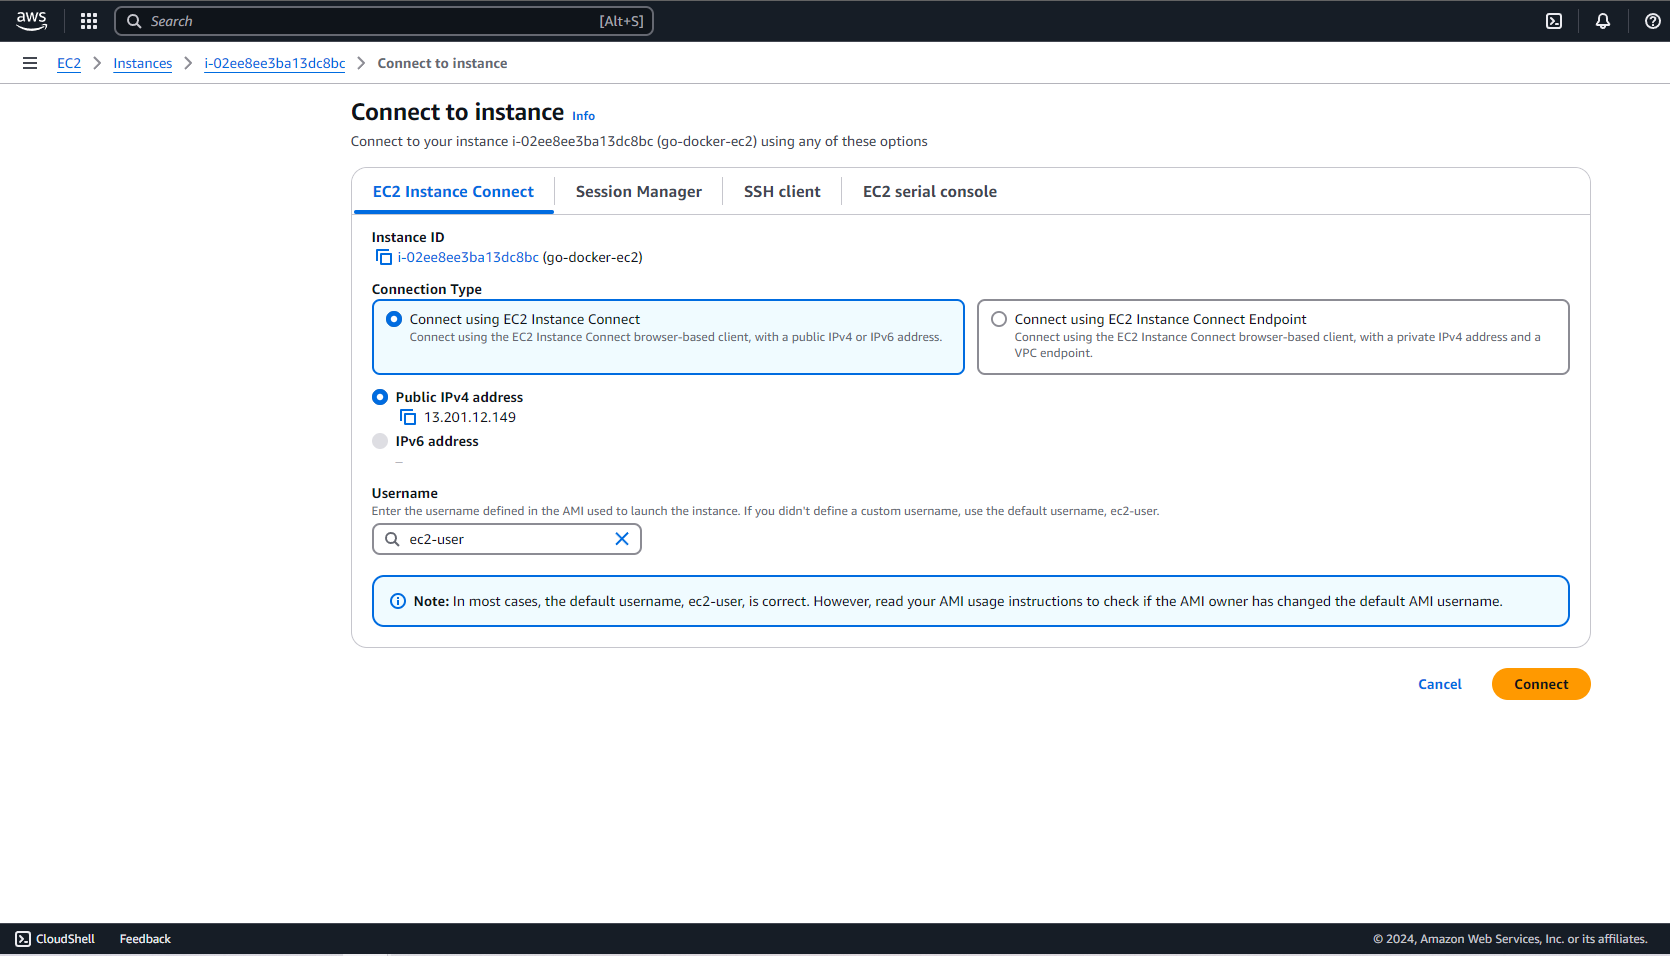
It will open a terminal setup after establishing an SSH session with the EC2 instance.
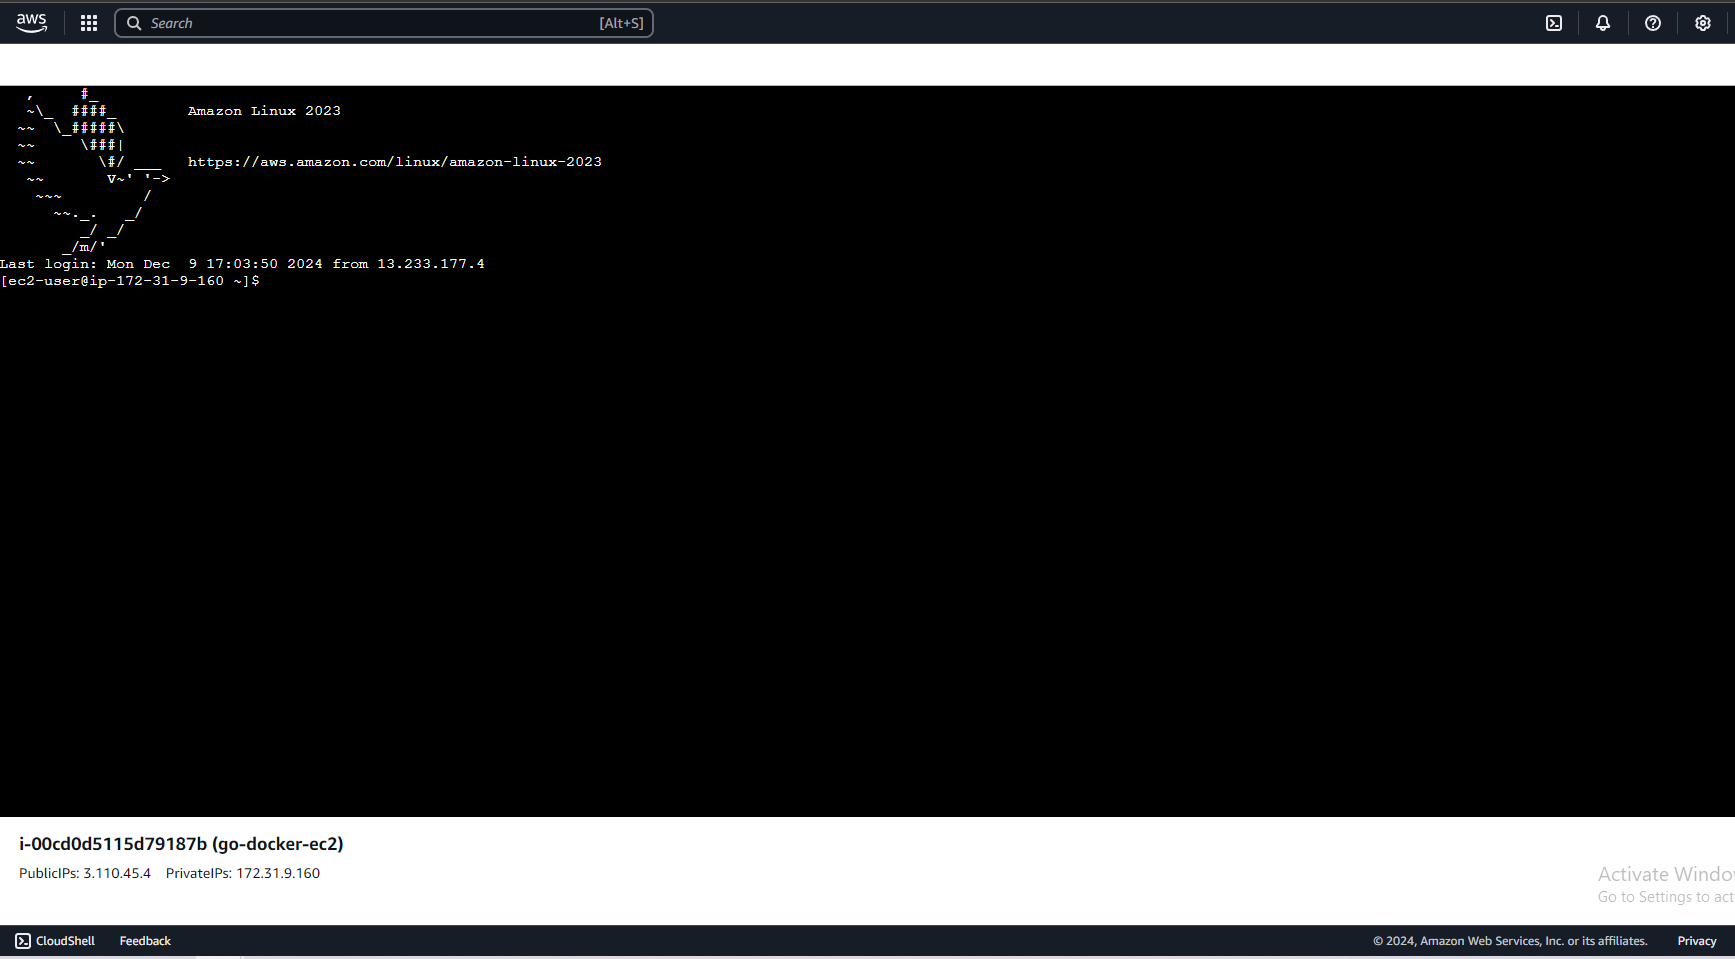
Now run the following series of commands for update and set up of Docker on the instance
sudo dnf update -y
sudo dnf install docker -y
sudo systemctl start docker
4. Copy the code & run the Docker container on the t2.micro instance
Navigate to the directory on your local machine that contains the Go web server code and the Dockerfile. The directory structure should be similar to that of this GitHub repository.
Copy the PEM file that we download in step 2 to this folder & run the following command:
chmod 600 demo-key-pair.pem
This command will make the PEM file readable and writable only by the owner, with no permissions granted to others.
Next, to copy all the source code, the Dockerfile, and the PEM file to the EC2 instance, run the following command:
scp -i demo-key-pair.pem -r * ec2-user@<EC2-PUBLIC-IP>:/home/ec2-user
Replace <EC2-PUBLIC-IP> with the public IP of your EC2 instance, which can be found on the bottom left side of the EC2 Instance Connect page.
Then, in the EC2 instance terminal window, run the ls command to verify whether all the files have been successfully copied.
Now, run the below command to build the Docker image image:
sudo docker build . -t go-docker-ec2:latestOnce the Docker image is successfully built, run the below command:
sudo docker run -p 80:8080 go-docker-ec2:latestThe -p flag will map port 8080 from the container to port 80 on the EC2 instance. Port 80 is the default port for handling HTTP requests on an EC2 instance.
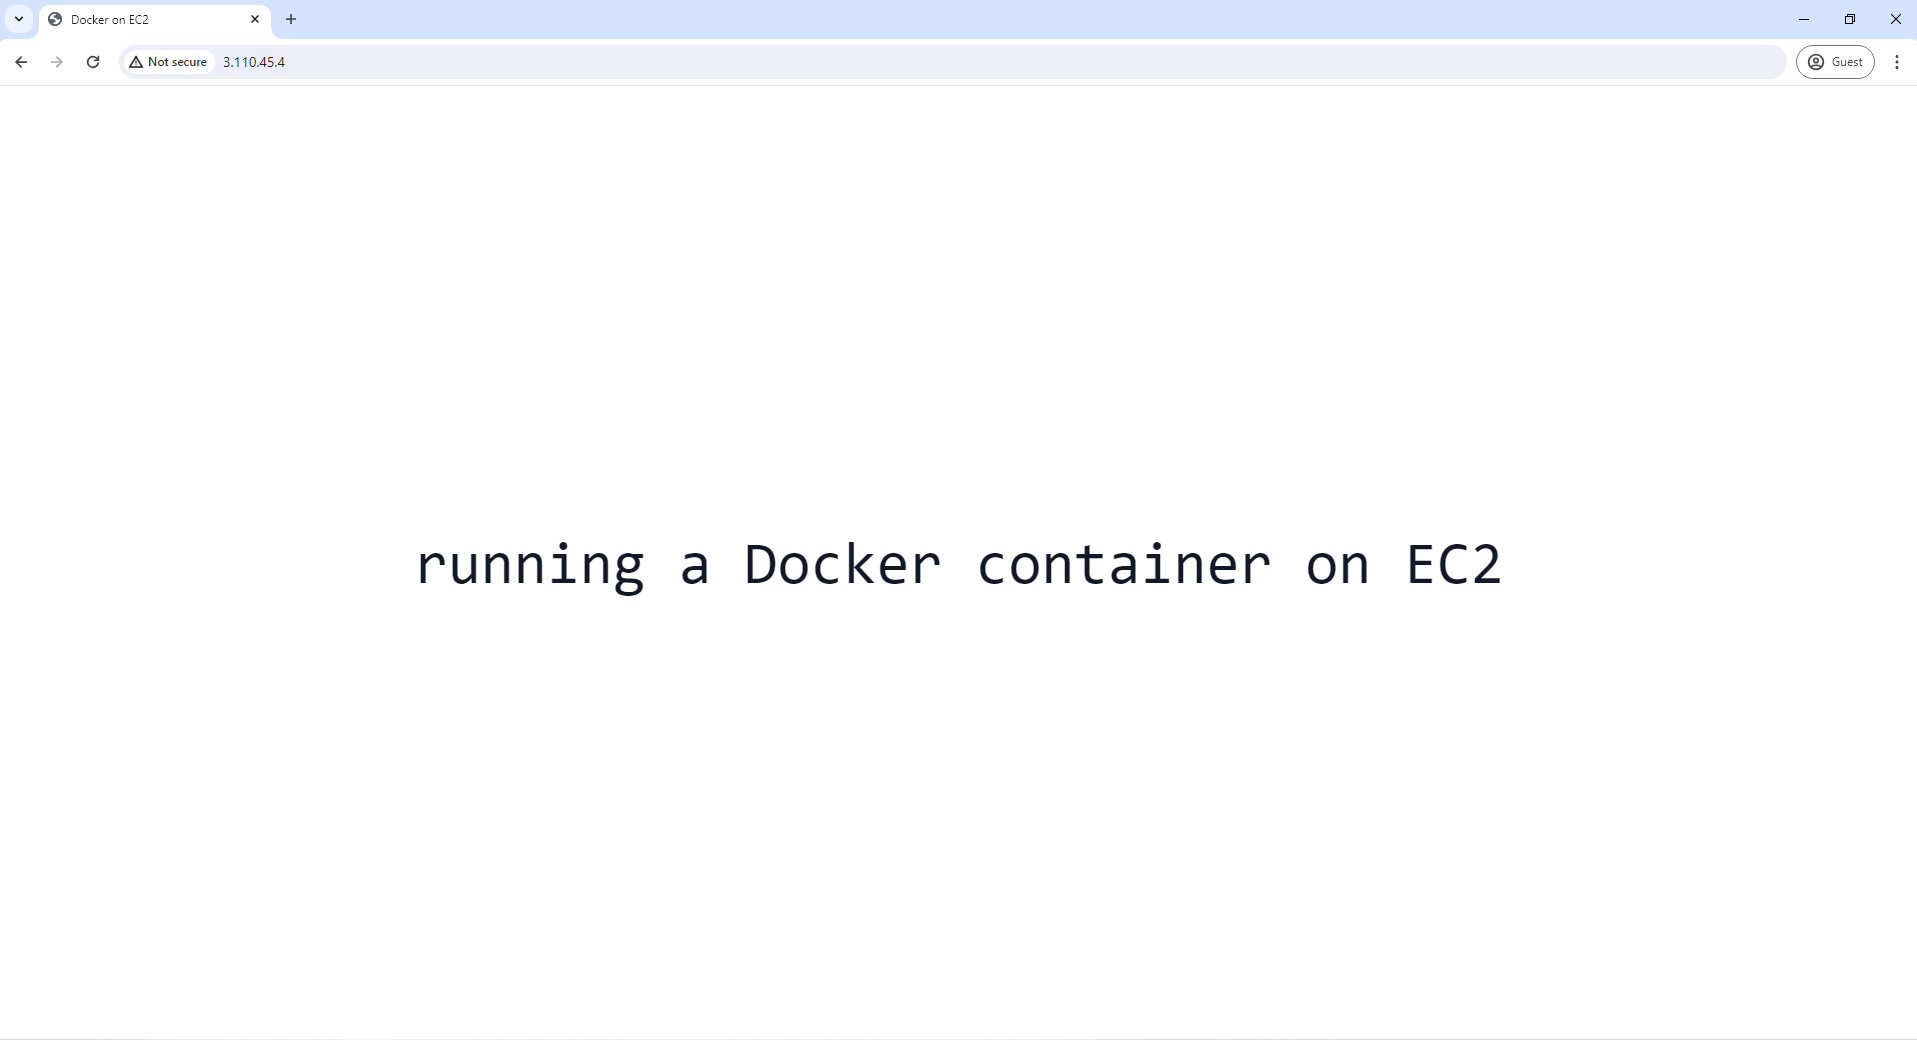
Finally, if you visit the public IP of the EC2 instance, you should see the simple HTML page from the templates folder being rendered.
Thank you for reading the article. If you encounter any issues while following the steps in the article, please leave a comment below, and I will do my best to help you.
Join Shounak on Peerlist!
Join amazing folks like Shounak and thousands of other builders on Peerlist.
0
7
1