How I Built a Custom AI Chatbot to Qualify Leads Automatically (Full Walkthrough)
Step-by-step breakdown of how I built a custom AI chatbot to qualify leads, score prospects, and book meetings automatically.
Last month, our sales team came up with a concern. They reported on making calls and following up on leads that were never going to convert.
Someone just fills out a contact form, and it gets added to the CRM. A rep spends at least 20 mins for the discovery call. After the call they find, it's the wrong budget, wrong use case or wrong requirement entirely.
They needed a solution. Our team suggested building our own chatbot, so I first looked into how to build an AI chatbot for a website before starting the implementation.
Our plan was to customize the chatbot to handle the first layer of qualification.
We had a simple, straight-forward plan:
Get the chatbot to ask the right questions,
score the leads based on the answers,
book call for qualified leads and
route the rest to the nurture flow.
I headed the project and in this post I’ll walk you through what exactly we did.
Part I: Agent Creation
1. Getting started with the AI chatbot
The first step is to create a personalized AI chatbot
Go to the MirrorFly AI agent dashboard
Log in to your account
Click on ‘Create Agent’
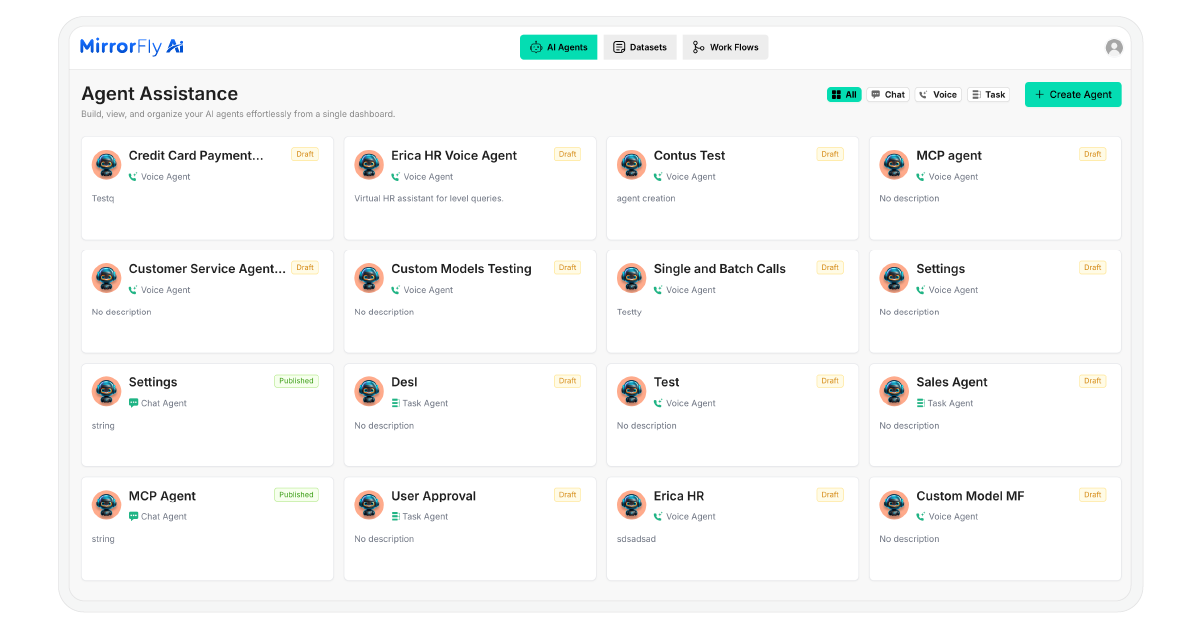
You will see three options: Chat Agent, Voice Agent, and Task Agent. For this project, select 'Chat Agent'.
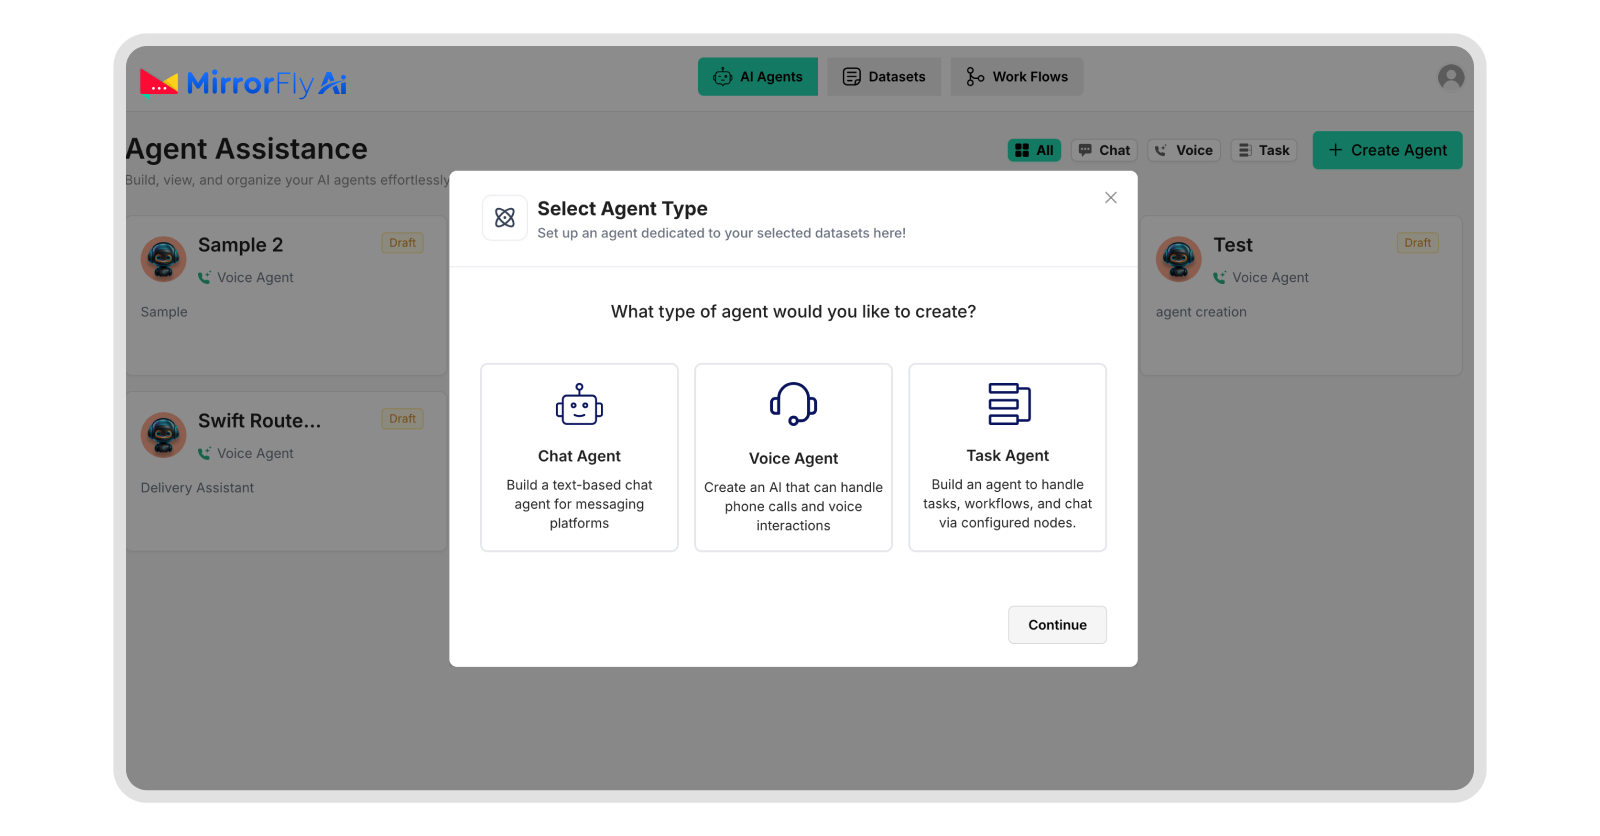
Now, click on ‘Continue’.
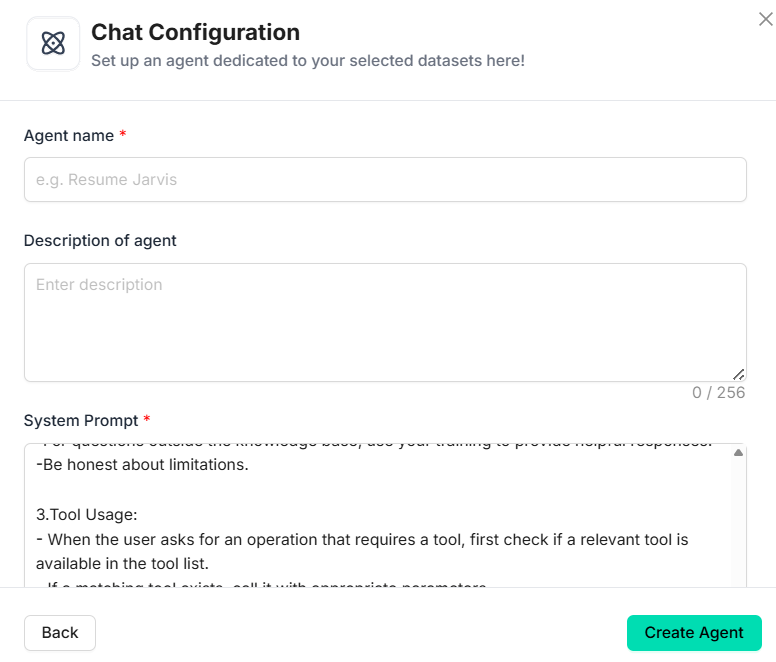
A chat configuration form will open. In this form, set the name of your agent, provide a description and then add all other details like language and opening message.
If you have a dataset already created, you can upload it here. Otherwise, you can upload it later by clicking on the dataset tab.
After setting up the basics, click on the ‘Create Agent’ button.
2. Configuring Agent Personality & Model
On your dashboard, configure the following parameters:
Formality: Casual, neutral or formal
Tone: Personable, confident, empathetic, engaging, witty or direct.
AI model - one from OpenAI or Anthropic
SDK key: you’ll need one during the integration process.

3. Agent Training
To train your agent with your business information, you’ll need to have a knowledge base handy.
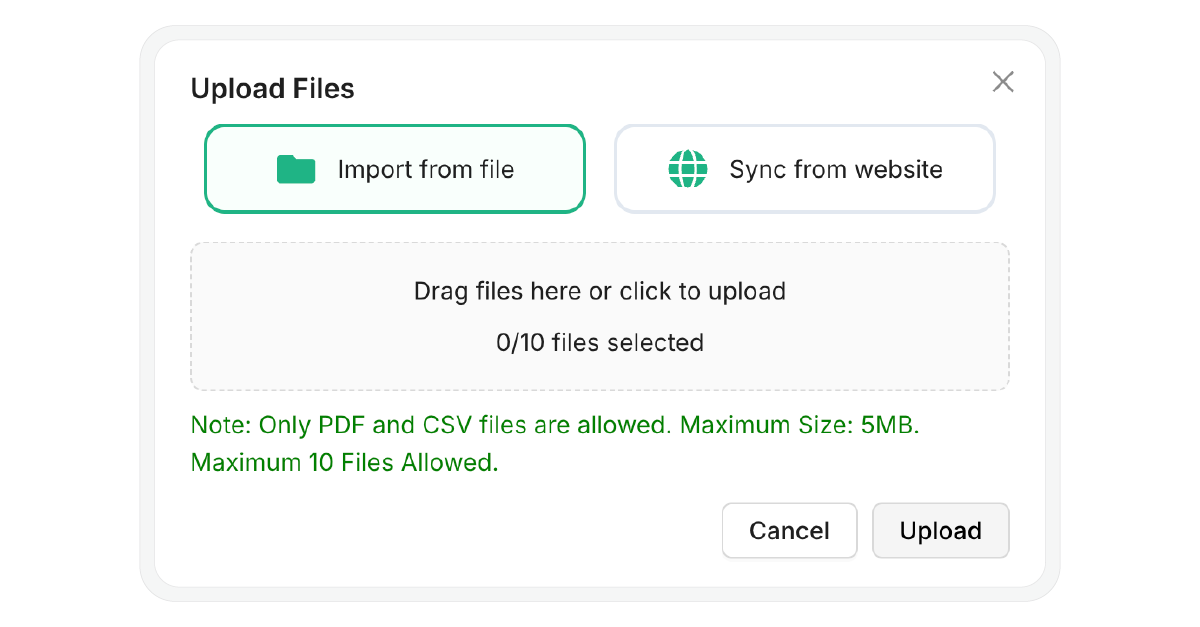
If you want to add the knowledge base as documents, follow these steps:
Prepare the details of your product/ services.
Save them in PDF, CSV or TXT format on your computer.
To upload them, navigate to Datasets.
Click on ‘Import from file’.
If you prefer connecting your business website to your chatbot,
Click on the ‘Sync from website’ button.
Give a name to this dataset (website reference).
Add the URL you need the chatbot to fetch data from.
4. Workflow Builder
By now, all your elements are ready. Now, you need to logically connect them to create the conversational flow.
To set up how and what your chatbot must respond,
Go to the Workflows tab.
Drag and drop the conversational elements as per your chat flow.
Add forms wherever applicable.
Create message nodes and email triggers.
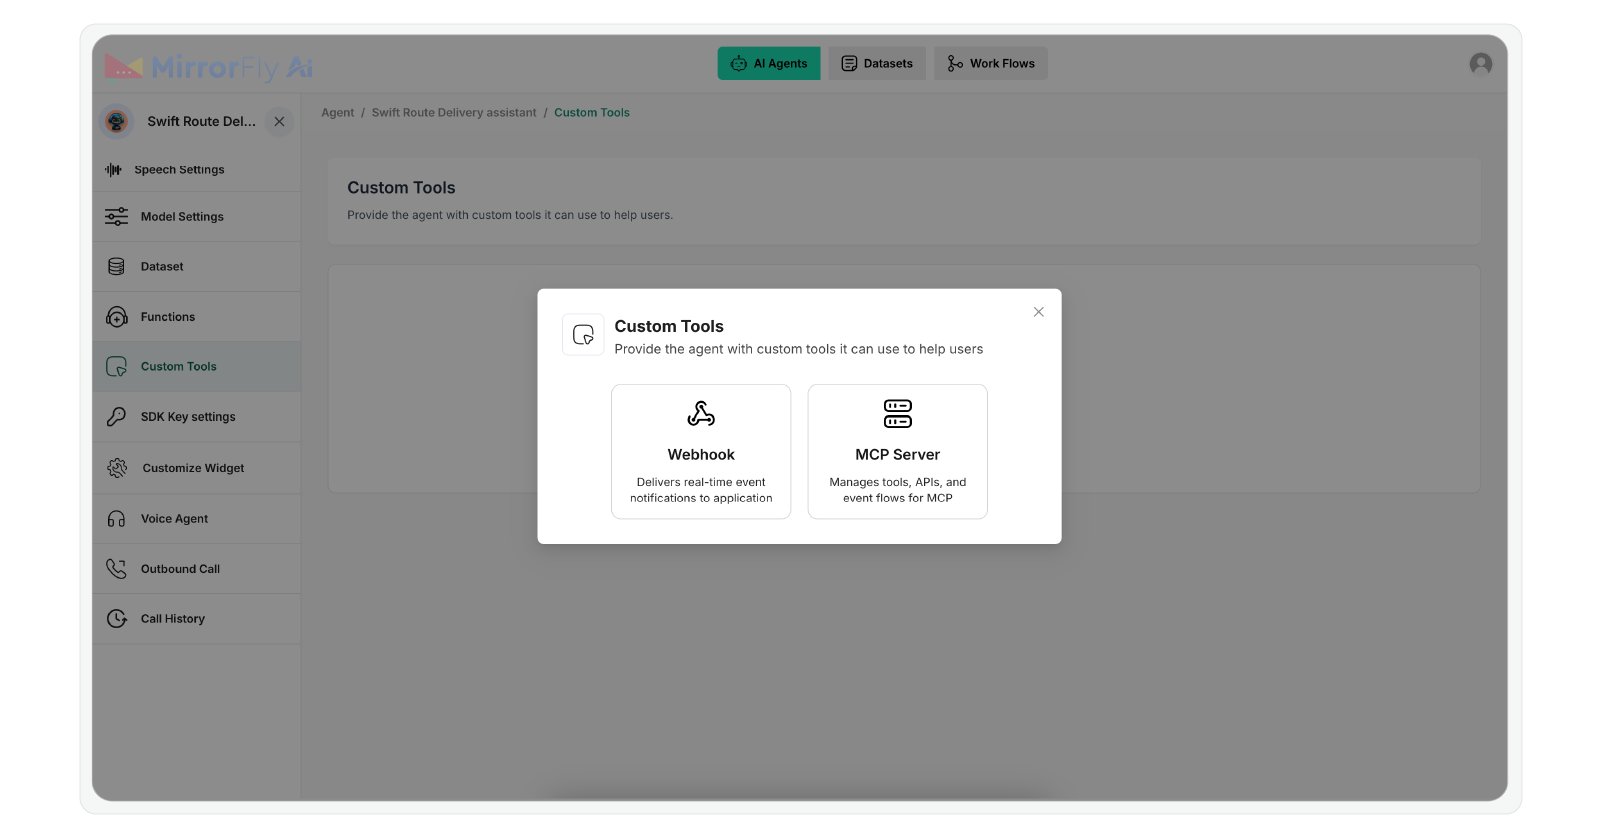
5. Connect Custom Tools
You’ve come to the last part of creating an AI agent.
You’ve customized the agent and created the chat flow.
To connect the chatbot to your everyday tools,
Click on Custom Tools.
Select Webhook if you want to send and receive real-time data to your chatbot from third-party apps.
To provide the chatbot access to external tools like CRM, or data sources like Custom Databases, connect it to an MCP server.
You’ve now created a fully white-label AI chabot. In the next phase, we’ll look into the steps to connect the agent to your website or app.
Part II: Integrating the Agent Into Your Website
What you’ll need?
Your Agent ID from the dashboard.
Your website must run on HTTPS for microphone access.
Latest versions of Chrome, Edge, or Safari.
Supported Browsers: Latest versions of Chrome, Edge, and Safari.
1. Install the SDK
Copy the script provided below.
Paste it into your HTML file.
<scriptsrc="https://d1nzh49hhug3.cloudfront.net/aiVoiceScript/uat/mirrofly/mirror-fly-ai.v1.1.1.js"></script>2. Initialize the Agent
Add a container element to your HTML file.
Then initialize the SDK using your configuration settings.
// HTML Container
<div id="widget"></div>

// Initialization
MirrorFlyAi.init({
 container: "#widget",
 agentId: "<YOUR_AGENT_ID>",
 title: "Voice Assistant",
 theme: "dark",
 triggerStartCall: true,
 transcriptionEnable: true,
 transcriptionInUi: true,
 chatEnable: true,
 agentConnectionTimeout: 500
});
3. Handle Callbacks
Set up callbacks to track when the agent connects or disconnects.
You can also use them to collect transcription data.
const callbacks = {
 onTranscription: (data) => console.log("Transcription:", data),
 onAgentConnectionState: (state) => console.log("Connection:", state),
 onError: (error) => console.error("SDK Error:", error)
};
4. Dynamic Agent Switching
If you are using multiple agents,
use this function to switch between them instantly.
function switchAgent(newAgentId) {
MirrorFlyAi.destroy();
document.querySelector("#widget").innerHTML = "";
MirrorFlyAi.init({
container: "#widget",
agentId: newAgentId,
triggerStartCall: true
});
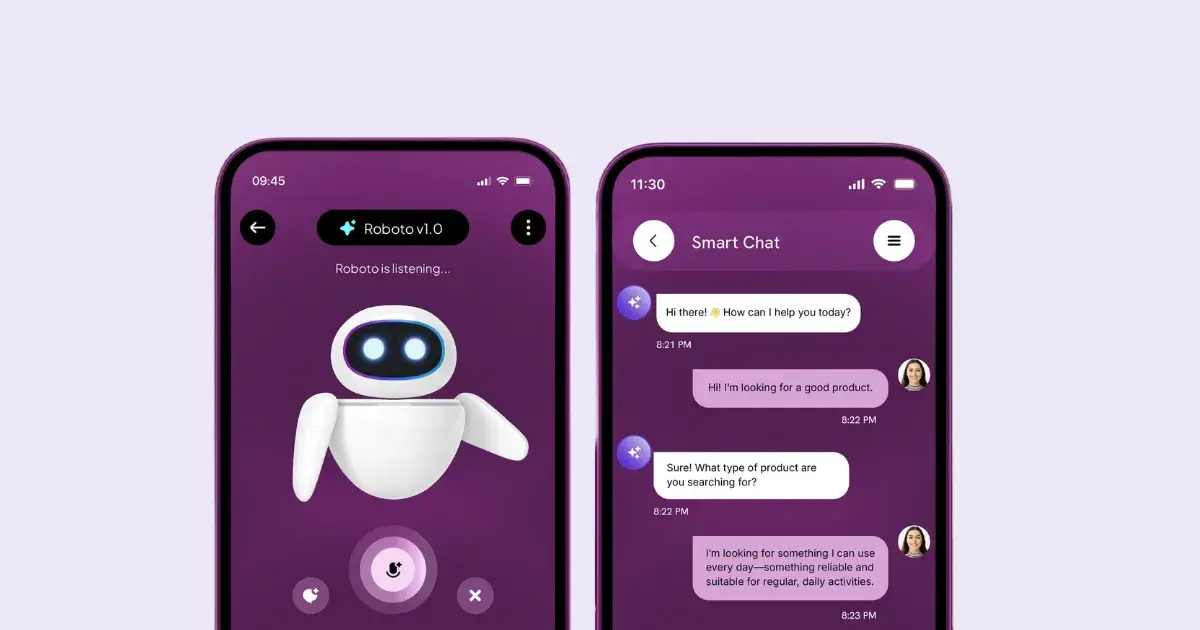
}You now have a working AI chatbot implemented into your platform.
This chatbot can answer common user questions automatically.
And when human intervention is required, the chatbot can hand-off the conversation to a live agent.
Back to our experience
We deployed the agent, and did not have a meeting until a week later. The leads started hitting their calendar and were actually worth talking to.
We set the right flow and the right questions - budget, team size, current tools and timeline.
Our rep had almost all the information they needed to get on the call and convert them into business.
If you're building a lead qualification chatbot, I’d recommend trying this out. For my next few chatbot app development projects this is the stack I'd use again without hesitation. If I come across an interesting project, I’ll write about it in the next article!
Need more details or got any feedback? Drop a comment below!
Reference: If you'd like to explore the full implementation and code setup, check the GitHub repository here: https://github.com/MirrorFly/White-Label-AI-Chatbot
Join Shyam on Peerlist!
Join amazing folks like Shyam and thousands of other builders on Peerlist.
1
1
0